¶ Inventory Stock Updates
Products must be assigned to a minimum of one warehouse. Stock updates are made on a per item/warehouse basis. This means if SKU 101 is available in Warehouse #1 and Warehouse #2, stock updates for item 101 are made in one of the assigned warehouses.
Stock updates can be done on an item by item bases or through a bulk update.
¶ Item Level Stock Updates
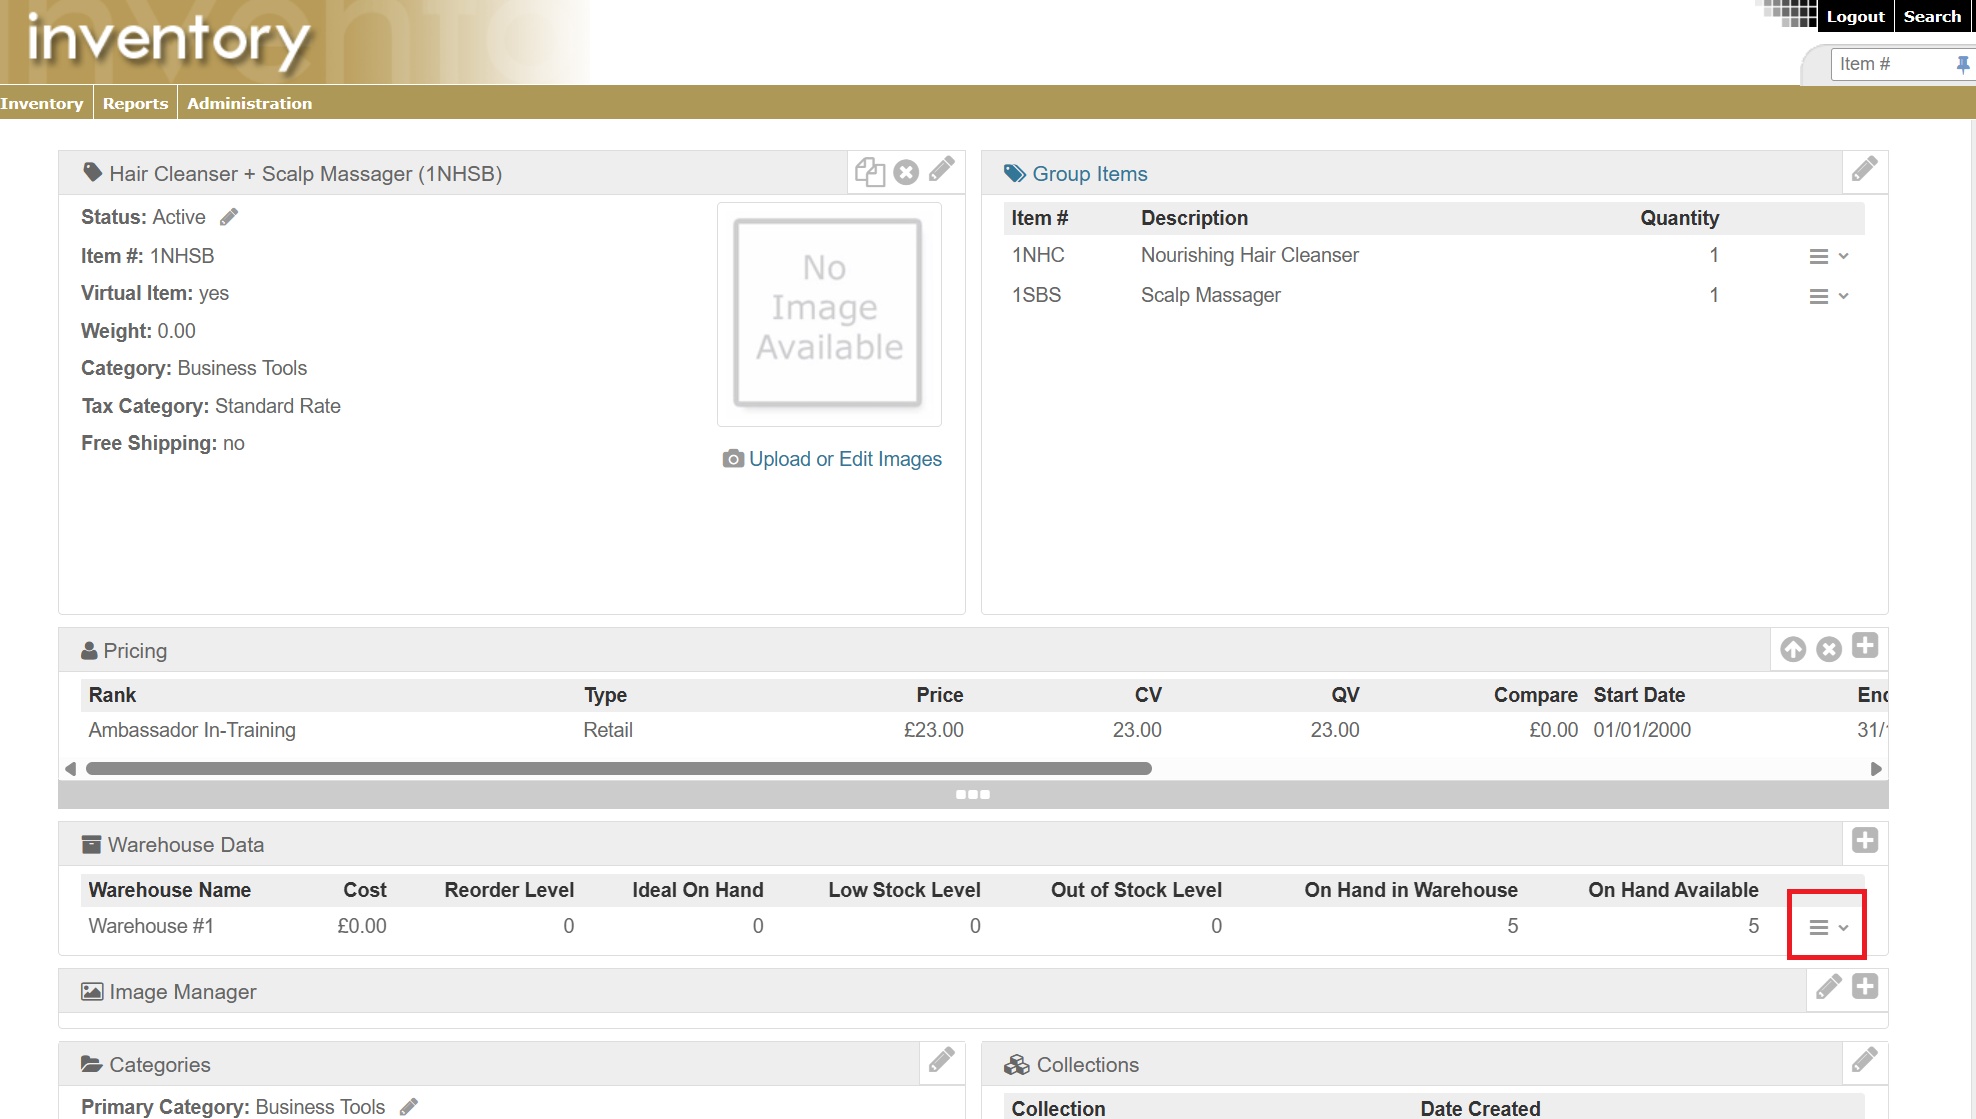
To update a single item's stock, navigate to the item in the Inventory Department:
- Under Warehouse Data, locate the hamburger icon
- Click Edit On Hand
Decide if the update is going to ADD to the current stock count or OVERRIDE current stock counts
¶ Add to Stock Counts
- Enter the amount to be added to the current stock count in Quantity Change
- Check the checkbox for which on-hand count this stock update should be applied to
- Enter a Ledger Note to document the purpose of this stock update
- Click Save
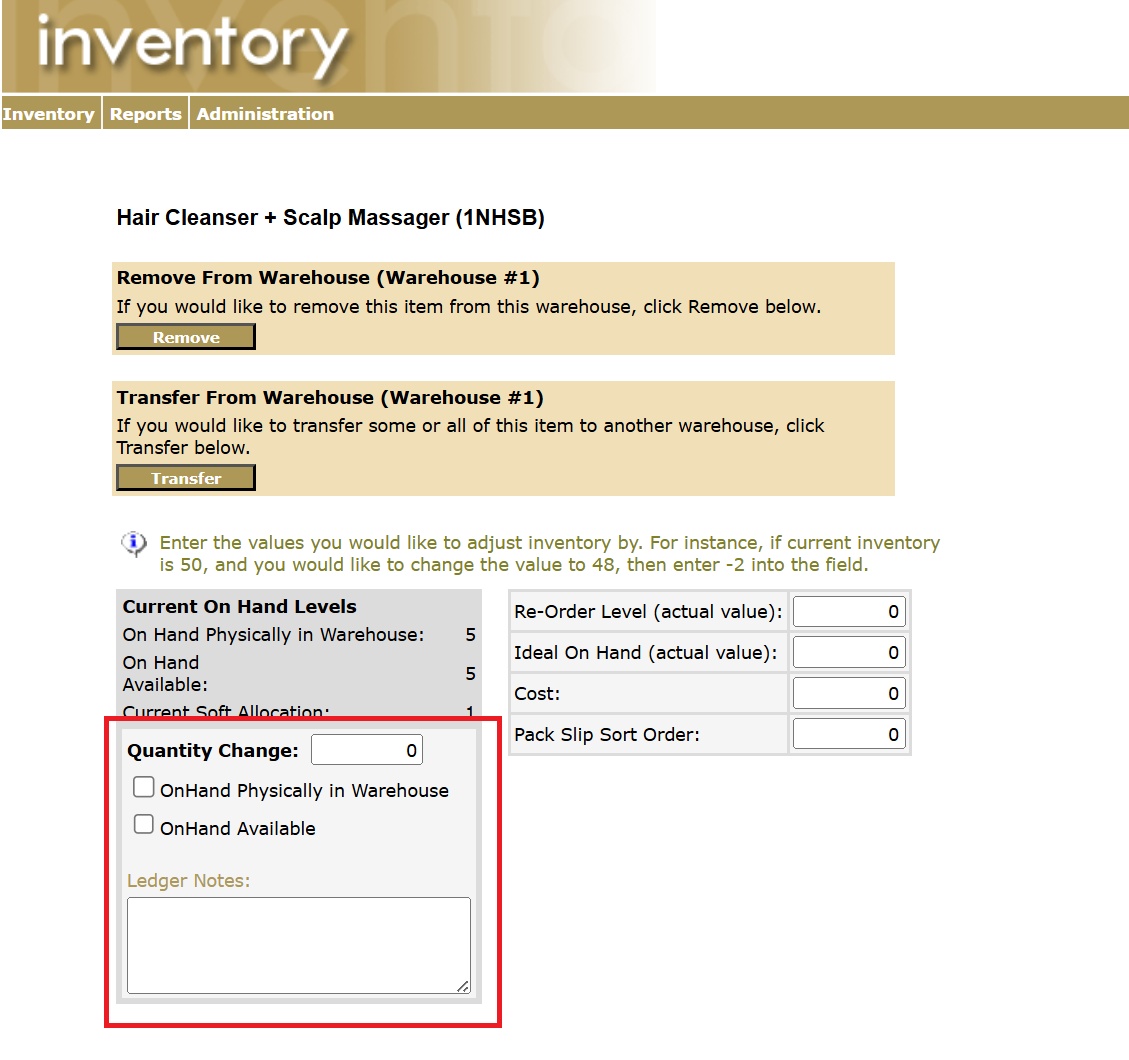
¶ Override Stock Counts
- Scroll down on this page and select Advanced >>
- Enter the amount to be added to the current stock count in Quantity Change
- Check the checkbox for which on-hand count this stock update should be applied to
- Enter a Ledger Note to document the purpose of this stock update
- Click Save

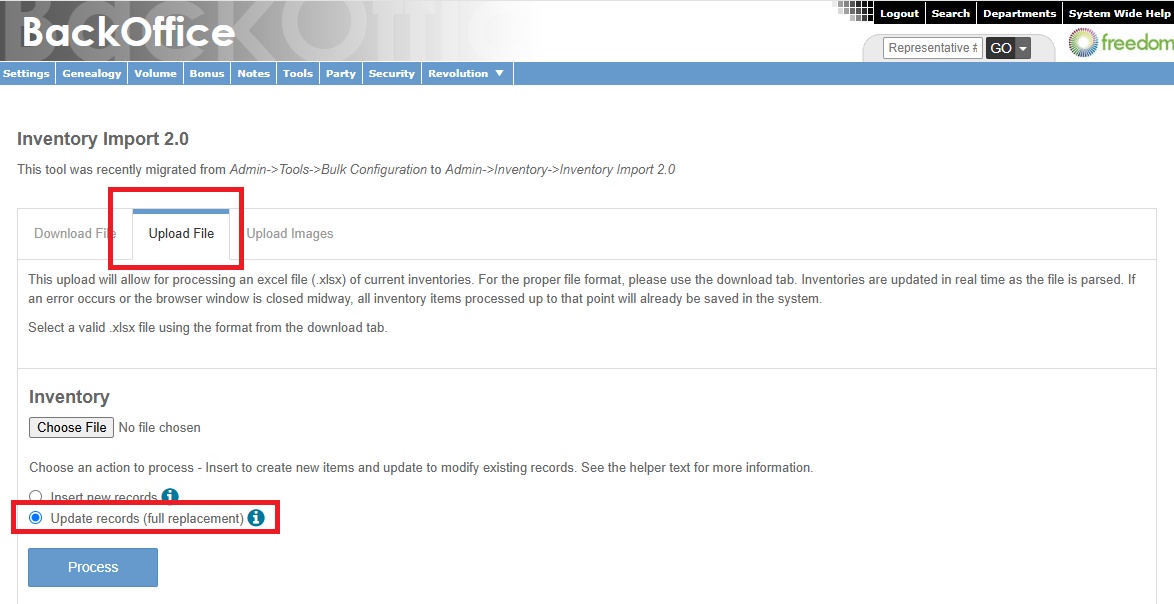
¶ Bulk Stock Updates
Departments > Administration >> Settings > Inventory > Inventory Import 2.0
This is used when multiple items need to be updated at one time. Using the bulk updates method does an override of the stock levels.
ByDesign recommends to download the inventory file to ensure the correct format is being utilized
- Select the Country (if applicable)
- Item Warehouses
- Select the items that need to be updated
- Click Download
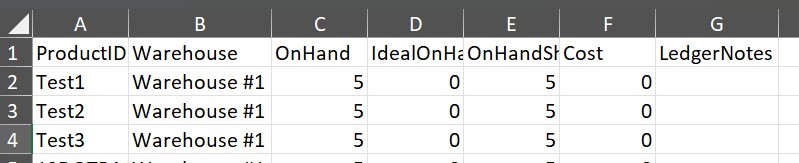
If choosing not to download the file, the file must be an Excel (XLS) format with the following headers:
- ProductID: This is the product SKU
- Warehouse: This is the Warehouse Description as it's setup in Freedom
- OnHand: This is the on-hand available
- IdealOnHand: This is for reporting to notify when the item has reached below the ideal amount on-hand
- OnHandShipped: This is the on-hand in warehouse
- Cost: This is the cost for manufacturing the product
- LedgerNotes: This is the note that will be added when the file is updated.
Once the file has all the necessary updates, navigate back to the Inventory Import 2.0 page
- Choose Upload File in the tab at the top
- Choose the file from the local device
- Select Update Records (full replacement)
- Click Process