¶ Introduction
Creating an inventory item can be performed in
¶ Process Overview
The process of creating an item walks you through setting up the basic information about the item, adding the item to the warehouse or warehouses youhave configured, and configuring the initial price rows.
to bulk add items, please also see Inventory Import.
¶ Add Item
The Add Inventory Item page allows you to enter all the details of your new Inventory Item. Individual SKUs can be configured for multiple countries, but only one currency. To add an Invetory item, pleawse follow the steps below.
Departments > Inventory > Click the "+" to Add a new Inventory Item
- Item #: is how you will identify your Inventory Item. This can be an arrangement of alphanumeric characters (numbers and letters.) Often, this is interchangeable with the term SKU.
- Description: will be the full display name for your item. For example 'Pink Sports Shoe'.
- Pack Slip Description: If you would like the item display name to be different on the PackSlip, this will override the 'Description'. For example, PinkShoe as opposed to Pink Sports Shoe.(Optional)
- Explanation and Long Explanation: Display stacked in the online shopping cart. Therefore, we advise that you use the long description as long as you have less than 6000 words. You may also use HTML, but keep in mind that the 6000 word limit still holds true.
- Rep Featured Item: Displays this item in the Featured Items section of the Shopping Cart for Reps only.
- Customer Featured Item: Displays this item in the Featured Items section of the Shopping Cart for Customers only.
- Category: Chose the Category the item belongs to
- Product Category Secondary: Choose a secondary Product Category for the item. (Optional)
- Tax Category: Choose the Tax Category for the item
- Currency Type: Choose the Currency Type for the item

Individual SKUs can be configured for multiple countries, but only one currency.
- Gift Certificate Type: Choose the Gift Certificate type being awarded when purchaing this item
- Gift Certificate Amount: If an amount greater than 0 is entered, a unique Gift Certificate number will be generated when this item is purchased
- Sort Order:
- Make Autoship the Default Option: If this option is checked, in order to comply with Visa/MC guidelines, a “must accept” Terms and Conditions that clearly states that the Order contains a subscription, must be added to the Checkout Page This does not work for items associated to Inventory Relationship Groups.
- Warehouse #: Select the Warehouse(s) that will use the item.

Hold CTRL key to selected multiple warehouses.
- Virtual Item: Indicates an item that will NOT be physically shipped like website fees and annual membership fees.
- Free Shipping: If enabled, the item will not be factored in the calculation for shipping.
- Base Shipping Surcharge: Base surcharge for Shipping to include when calculating Shipping costs.
- Weight: This field is used for calculating Shipping costs if Shipping is calculated based on weight.

Use a uniform unit of measurement (ounce, pound, gram) for everything, regardless of in which country it is used.
- Handling Fee: If enabled, will include handling fee in calculation of shipping costs.
- Extranet AutoShip - Cannot Disable
- Low Stock Level: Sets the minimum quantity on hand before an alert that the item has low stock level is shown.
- Default Low Stock Msg: This item is low on stock. Hurry! Place your orders quickly before we are completely out.
- Override Low Stock Msg: You can replace the default Low Stock messgae by typing your own message here.
- Out of Stock Level: The minimum quantity to set for when the item is considered "out of stock".
- Default Out Of Stock Msg: This item is currently out of stock. Please check back later.
- Override Out of Stock Msg: You can replace the default Out of Stock messgae by typing your own message here.
- Renewal Increment (months): Number of months that a Rep's Renewal Date is changed by when this item is purchased or returned (order status of posted or voided).

A Renewal Item is any item with a Renewal Increment that is not N/A.
- Miscellaneous Fields: Additional customized fields can be requested by client.
If you are using INVENTORY_BY_COUNTRY, you will need to update the country selections for the item before it will be available
¶ Configure Warehouses
To view or configure a warehouse, navigate to Warehouses in the Freedom BackOffice.
Administration > Settings > Warehouse > Warehouses.
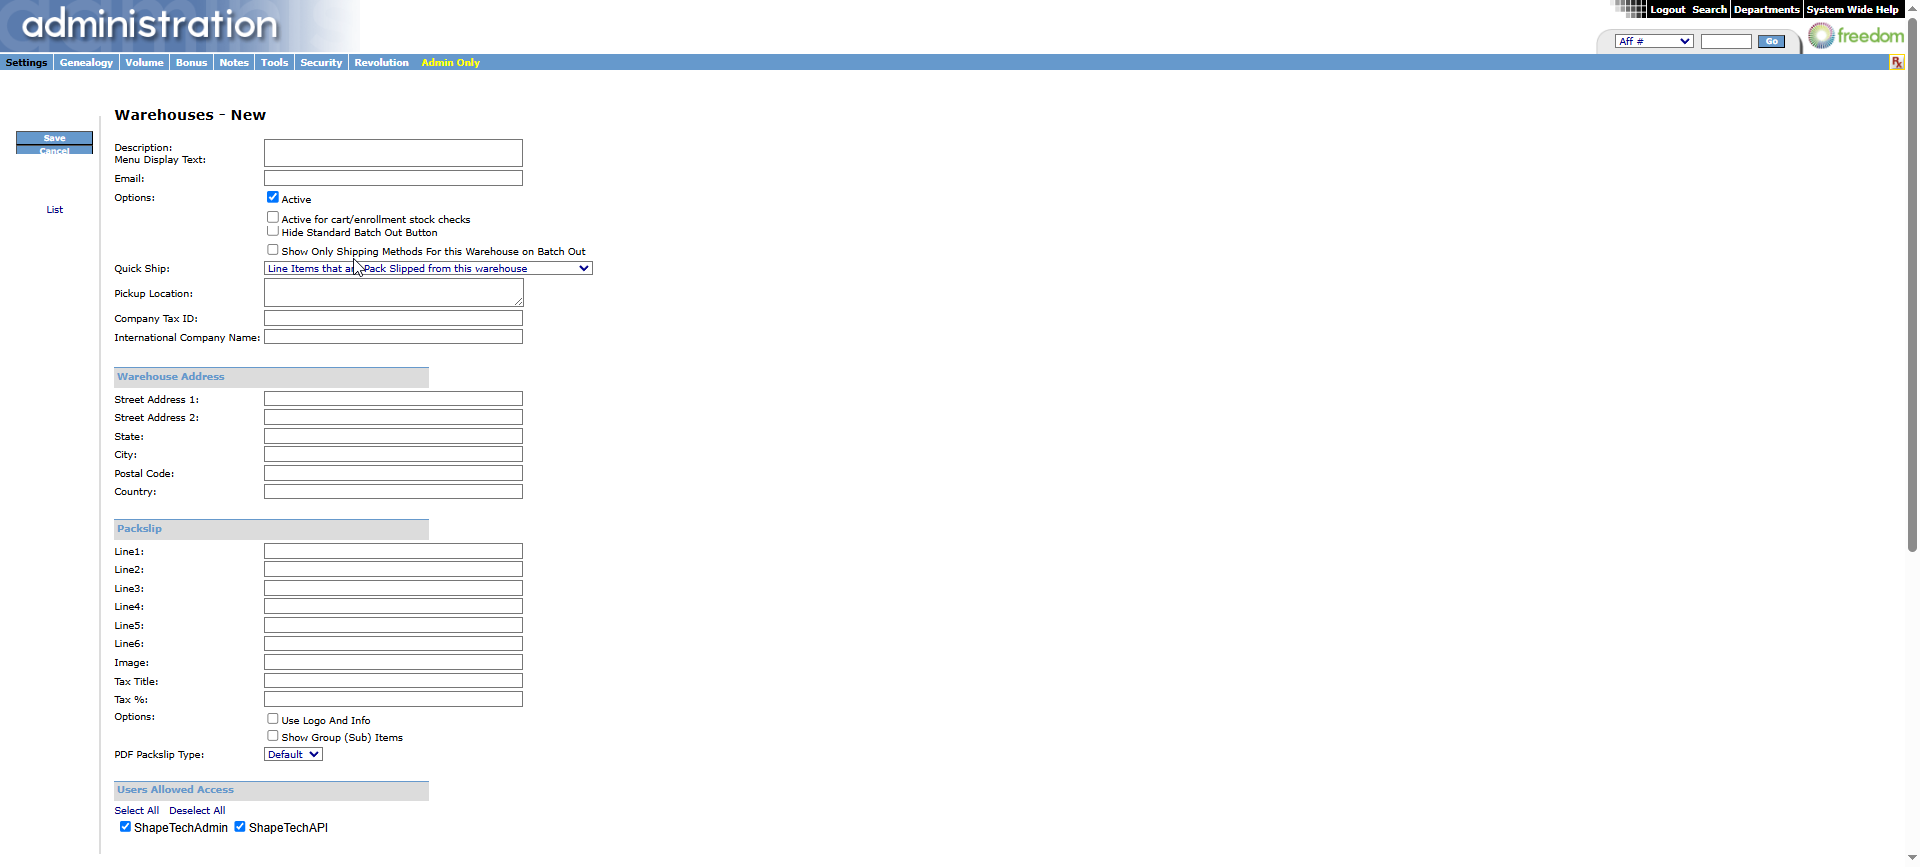
To create a new Warehouse, select new.
On the new Warehouse page, setup the base warehouse information: description, warehouse address, email, and any specific information needed for the packing slips.
As new Warehouses are added, they will show in the global menu.

Once a new Warehouse has been added, you will need to create a Warehouse Territory.
¶ Warehouse Territory
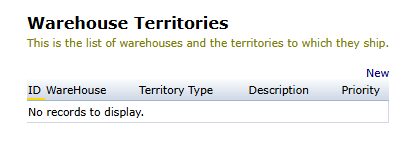
Administration > Settings > Warehouse > Warehouse Territories
Once a Warehouse is created, will you need to make it available to the States or Countries that it services (the shipping address). You would need to add a line item for each country that a particular warehouse services. So, you would see many lines for a warehouse in Europe that services all of the countries in Europe.
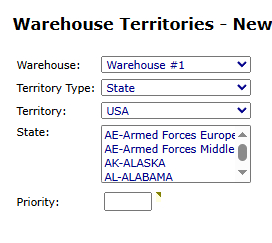
- Click "New"
- "Warehouse": Choose the name of the Warehouse you want to create a Territory for
- Choose the Territory Type
- Choose the Territory
- Choose the State
- Choose the Priority: The Priority determines which Warehouse is first selected to Ship the Item. If multiple Warehouses share the same priory level then the determination is random between those Warehouses
¶ Add Prices
- brief explanation of the available options
- ensure clarifications of why multiple ranks for the given price type will need to be selected
- include that only one price type can be added at this step. additional price types can be added after this step as they will be navigated to the item detail page
¶ Additional Information:
For additional information about inventory, see the following:
Edit Inventory Items - BROKEN
Inventory - BROKEN
Availability Flags
Bonus Values
Inventory Prices
Availability Dates
Prices
Price Values
Create Price Rows
Edit Price Rows
Delete Price Rows