¶ Configuring Zapier (Webhooks)
In this example we will provide instructions on how to setup Zapier to receive an incoming WebHook from Freedom that can then be used to trigger an external action, in this case an email containing the data. Note that the Action could still be an interaction with another system via API or other App listed in Zapier.
The steps to configure the Zapier integration are as follows:
- Enable the Necessary Settings
1.1 For Webhooks
1.2 For API - Create the needed Zap Trigger
- Enable the required webhooks
- Create the needed Zap Action
Before configuring, it's important to first determine which Zapier features you will be using to know what you will configure.
For Best Results: We recommend the following:
- Zapier Starter Account at minimum
- Webhooks by Zapier (Premium) app
-- In most cases you will be using an API or Webhook for the communication into or out of Freedom.
To configure specific WebHooks, please see WebHooks. Additional documentation of the payloads provided by the various WebHooks can be found in your backoffice under Administration > Settings > Integration > WebHook Documentation.
¶ Step 1: Enable the Necessary Settings
The following settings will also need to be enabled in order to trigger the necessary Webhooks:
- ORDER_STATUS_NOTIFICATION_ACTIVE_TRIGGER
- REP_NOTIFICATION_ACTIVE_TRIGGER
- CUSTOMER_NOTIFICATION_ACTIVE_TRIGGER
- PARTY_NOTIFICATION_ACTIVE_TRIGGER (if applicable)
¶ Optional Settings
There are optional settings you may enable depending on what you require
- NOTIFICATIONQUEUE_PROCESSENABLED - Enable if you will be using the Bonus and Autoresponder webhooks
¶ Step 2: Create an API User Account
You will need to create a new API User Account for Zapier, and securely provide them with the Username and Password. Please see the article Configuring API User Accounts for steps on creating the API User.
¶ Step 2: Create the needed Zap Trigger
-
Log into your Zapier Account
-
Select Create Zap > Webhooks by Zapier
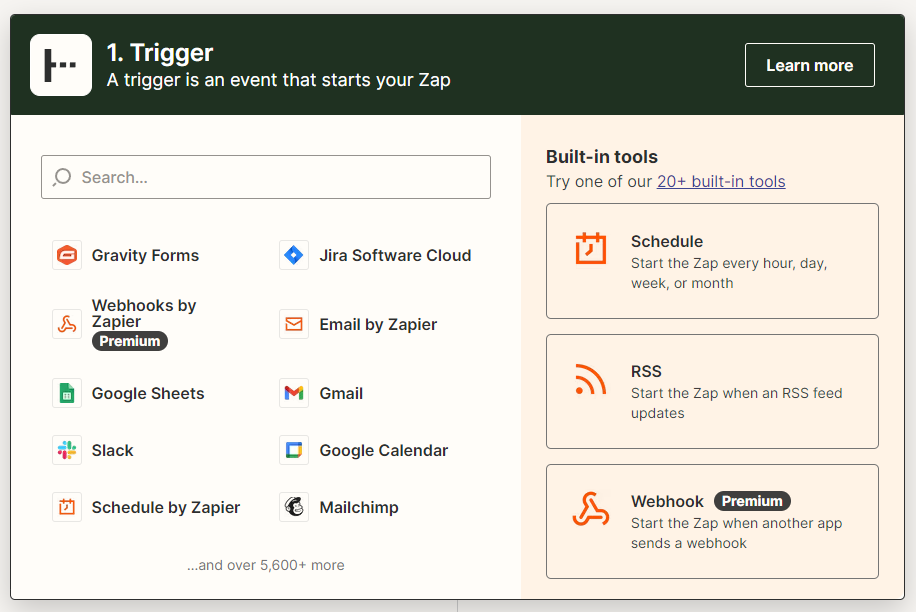
-
For the Event Trigger select "Catch Hook"
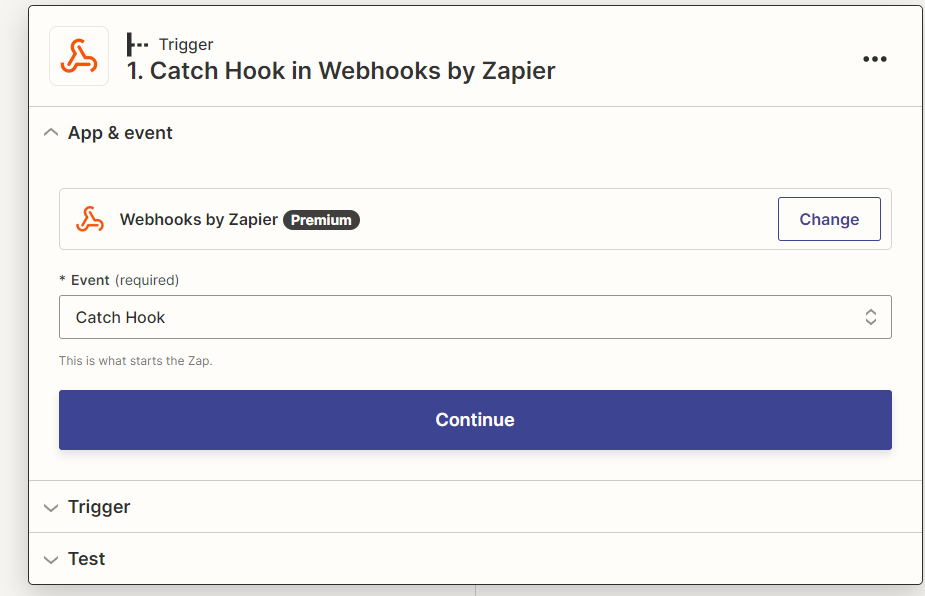
-
Select Continue
-
Leave "Pick off a Child Key" blank and select continue
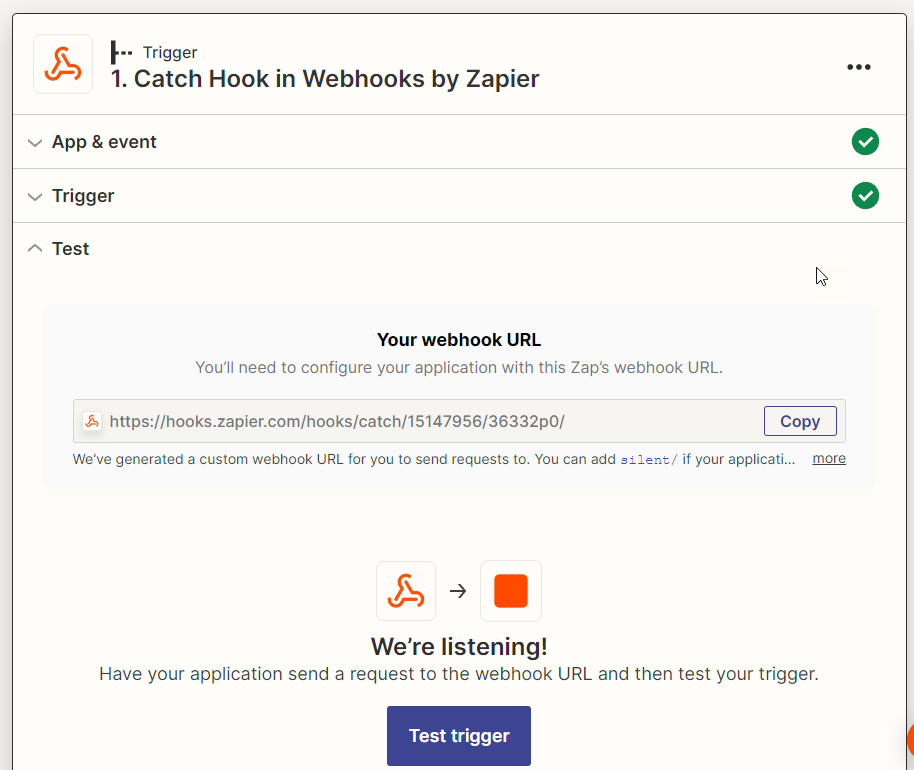
-
Zapier will now provide you with a URL that we will need for Freedom
¶ Step 3: Enable the Required Webhooks
WebHooks need to be enabled for the Trigger Types listed below and configured with the associated end points. Please see the article WebHooks for more information on how to use and enable these WebHooks.
- Log into Freedom
- Navigate to Departments > Administration > Settings > Integration > WebHook subscriber
- Select the Plus sign to add a new record
- Provide a description that works for your use. We will use "Zapier - Rep Signup" for our example
- Enter the URL from Zapier into "EndPoint URL"
- Make sure the correct WebHook is selected. In this example we are using Rep Signup
- Set it as Active.
- Select Create
¶ Step 3: Create the needed Zap Action
-
Go back to your Zapier Tab and select "Test Trigger"
-
Please note that this may fail if no signups or related trigger has taken place since you enabled the setting. It is highly suggested that you cause one of the triggers so that you will have access to the fields for the next few steps below.
-
Now we need to configure an action. As the information can be used in different way, we will just be using an email as an example, but we will populate the body as if it were the actual JSON response.
-
For actions select "Email by Zapier"
-
Set the Event to "Send Outbound Email"
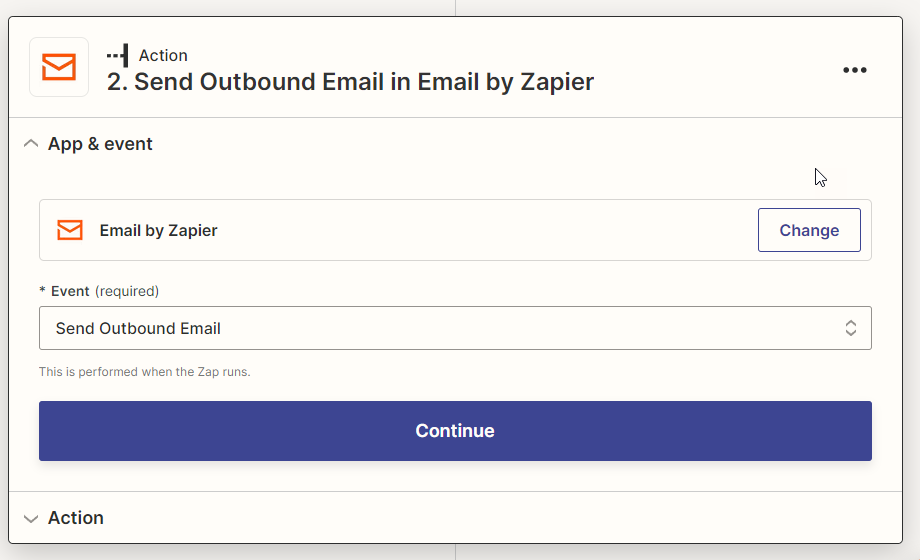
-
Select Continue
-
Provide an email address that will receive this each time.
-
Enter the desired subject
a. If you wanted to, you could use part of the webhook data in the subject, but this is not in scope of this initial instruction set. -
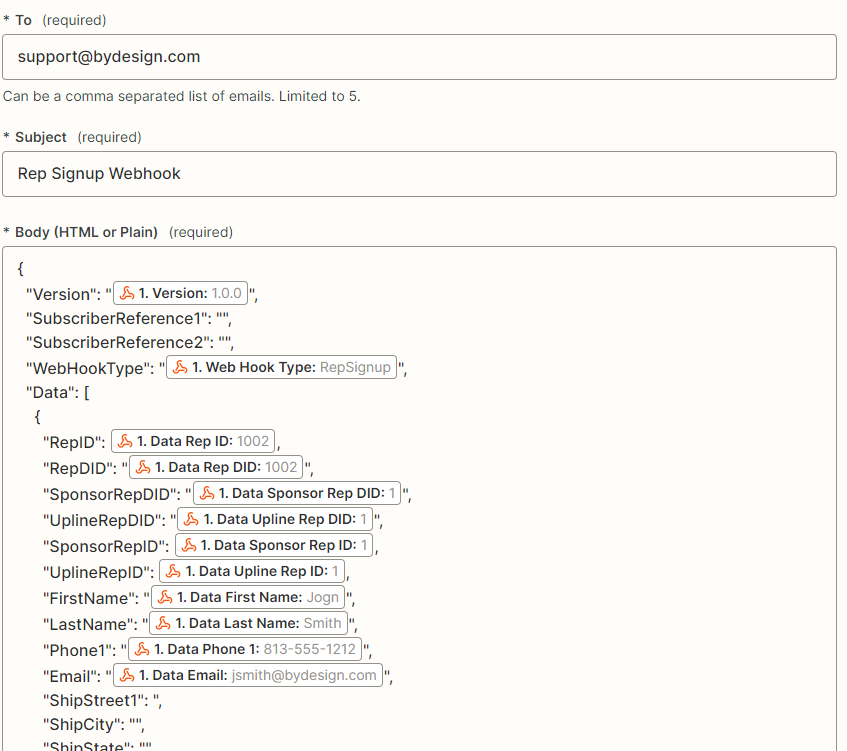
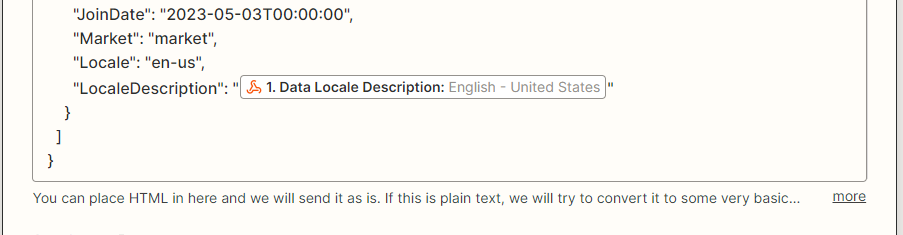
In the body, paste the example webhook response from the ByDesign Documentation
-
Then begin updated each field value with
a. Select a field, then select "Insert Data"
b. Select the field from the list or search for it.
c. Repeat as needed.
-
Select the From Name
-
Select Continue
-
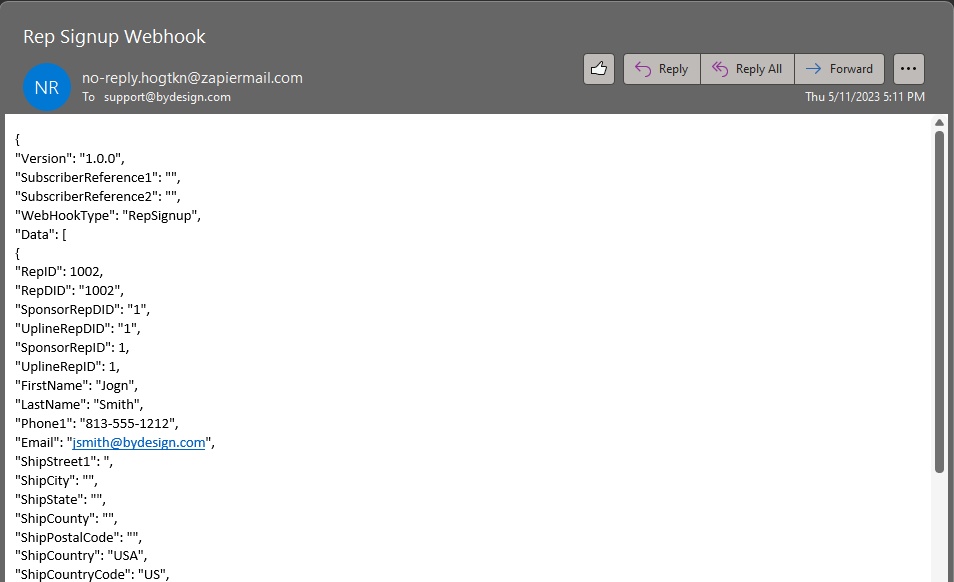
Select Test Action

-
Verify you have received the email containing the webhook data.
-
Select Publish
¶ Testing and Troubleshooting
To troubleshoot issues with the integration, please see WebHook Troubleshooting for details on reviewing the Webhook logs.