¶ Configuring Ziplingo
The steps to configure the Ziplingo integration are as follows:
- Enable the Necessary Settings
- Create an API User Account
- Export the Existing Contact Data
- Enable the required webhooks
Before configuring, it's important to first determine which Ziplingo features you will be using to know what you will configure.
For Best Results: Ziplingo will need to assist with testing after the configurations have been completed.
For information about the integration, please see Ziplingo.
¶ Step 1: Enable the Necessary Settings
First, enable the setting ZIPLINGO_INTEGRATION_ACTIVE to activate the integration.
In addition, the following settings will also need to be enabled in order to trigger the necessary Webhooks:
- ORDER_STATUS_NOTIFICATION_ACTIVE_TRIGGER
- REP_NOTIFICATION_ACTIVE_TRIGGER
- CUSTOMER_NOTIFICATION_ACTIVE_TRIGGER
- PARTY_NOTIFICATION_ACTIVE_TRIGGER
¶ Optional Settings
There are optional settings you may enable depending on what you require when using Ziplingo:
- NOTIFICATIONQUEUE_PROCESSENABLED - Enable if you will be using the Bonus and Autoresponder webhooks
- X2_DISPLAY_CUST_ZIPLINGO_PREFERENCES_MENUITEM - Enable to display the Ziplingo Preferences on a Customer's My Account page in the Shopping Cart
- ZIPLINGO_LINK_TRACKER_ENABLED - Enables link tracking within the Shopping Cart Checkout. Without this flag, events are not sent.
For steps on how to update Freedom Settings, please see the article Freedom Settings.
¶ Step 2: Create an API User Account
You will need to create a new API User Account for Ziplingo, and securely provide them with the Username and Password. Please see the article Configuring API User Accounts for steps on creating the API User.
¶ Step 3: Export the Existing Contact Data
The next step is to provide Ziplingo with the following data:
- Rep and Customer Contact Data
- Rep and Customer Types
- Rank Types
¶ Rep and Customer Contact Data
To retrieve the Rep and Customer Data, please use the Reps/Customer Data Export Report, as shown in the image below.
Departments > Reports > Integrations > Ziplingo > Reps/Customer Data Export Report
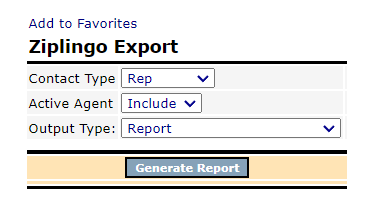
When generating the report for Reps and Customers, if you receive the error "No agent found with programming key CQA_ACTIVE in Comp Configuration ID 35", please change the Active Agent from 'Include' to 'Exclude'.
To download each report, the Export option will be available at the top right of the report.

¶ Rep and Customer Types
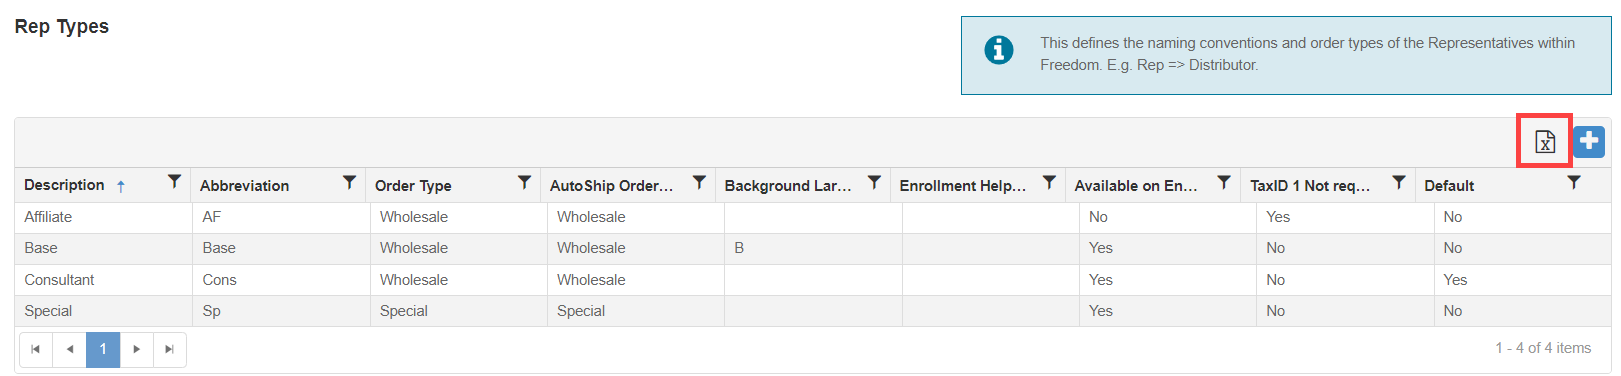
To retrieve the Rep Types, go to the Rep Types and select the Export option, as shown in the image below.
Departments > Administration > Settings > Reps > Rep Types
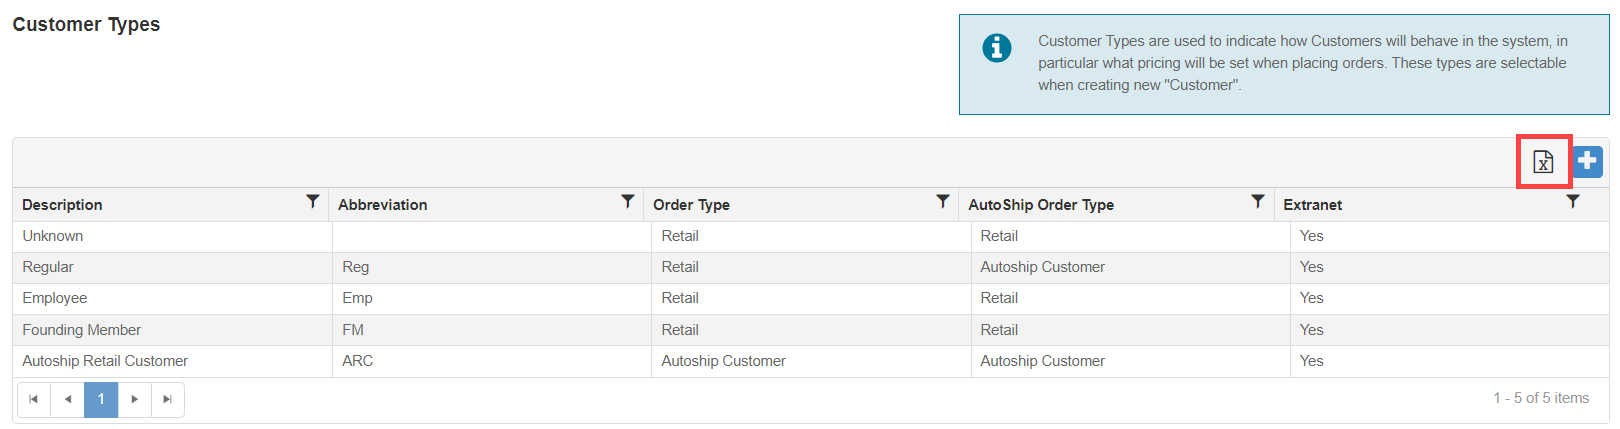
To retrive the Customer Types, go to Customer Types and also select the Export option, as shown in the image below.
Departments > Administration > Settings > Customers > Customer Types
¶ Rank Types
To retrieve the Rank Types, please use the GET api/admin/rankType API, replacing CLIENTNAME with your organization's name.
Request:
GET https://webapi.bydesign.com/CLIENTNAME/api/admin/rankType
Example Request:
GET https://webapi.bydesign.com/adapturedemo/api/admin/rankType
Response:
<?xml version="1.0" encoding="utf-8"?>
<WhereSelectListIteratorOfIRankTypeRankTypeViewModel>
    <RankTypeViewModel>
        <ID>integer</ID>
        <Description>string</Description>
        <Abbreviation>string</Abbreviation>
        <Explanation>string</Explanation>
    </RankTypeViewModel>
</WhereSelectListIteratorOfIRankTypeRankTypeViewModel>
¶ Step 4: Enable the Required Webhooks
WebHooks need to be enabled for the Trigger Types listed below and configured with the associated end points. Please see the article WebHooks for more information on how to use and enable these WebHooks.
- OrderShipped - http://platformapi.ziplingo.com/api/ByDesign/OrderEvent
- Rep Signup - https://platformapi.ziplingo.com/api/ByDesign/SyncContactV2
- RepEdit - https://platformapi.ziplingo.com/api/ByDesign/SyncContactV2
- OrderUnshipped - http://platformapi.ziplingo.com/api/ByDesign/OrderEvent
- OrderVoided - http://platformapi.ziplingo.com/api/ByDesign/OrderEvent
- RankChanged - http://platformapi.ziplingo.com/api/ByDesign/LifetimeRankEvent
- BonusQualificationChanged - http://platformapi.ziplingo.com/api/ByDesign/BonusQualificationEvent
- BonusRankChanged - http://platformapi.ziplingo.com/api/ByDesign/BonusRankEvent
- BonusCommissionEarned - http://platformapi.ziplingo.com/api/ByDesign/BonusCommissionEvent
- OrderPosted - http://platformapi.ziplingo.com/api/ByDesign/OrderEvent
- CustomerSignup - https://platformapi.ziplingo.com/api/ByDesign/SyncCustomerV2
- CustomerEdit - https://platformapi.ziplingo.com/api/ByDesign/SyncCustomerV2
The following optional fields are required for WebHooks configured for Ziplingo:
- Authentication Type
- Subscriber Reference 1
- Subscriber Reference 2
Subscriber Reference 2 is used used to generate API Endpoints on Ziplingo's end and must match the Client name on Freedom. If it does not match, you will see a 404 error because the API endpoints are pointing to wrong URL.
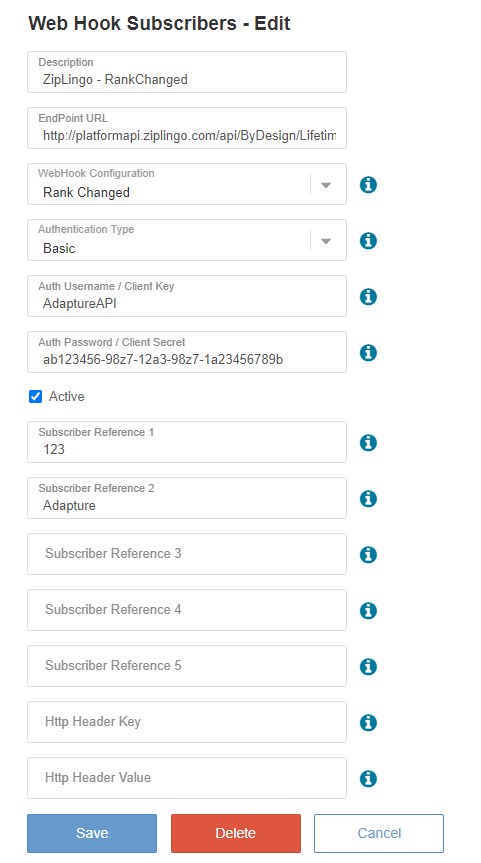
For additional information on the fields, please see the article Configuring WebHooks.
¶ Autoresponders Through Webhooks
If you will be using Ziplingo's Autoresponder feature, then you will have to set up the Autoresponder webhook with the end point below.
- Autoresponder - http://platformapi.ziplingo.com/api/ByDesign/ExecuteARTrigger
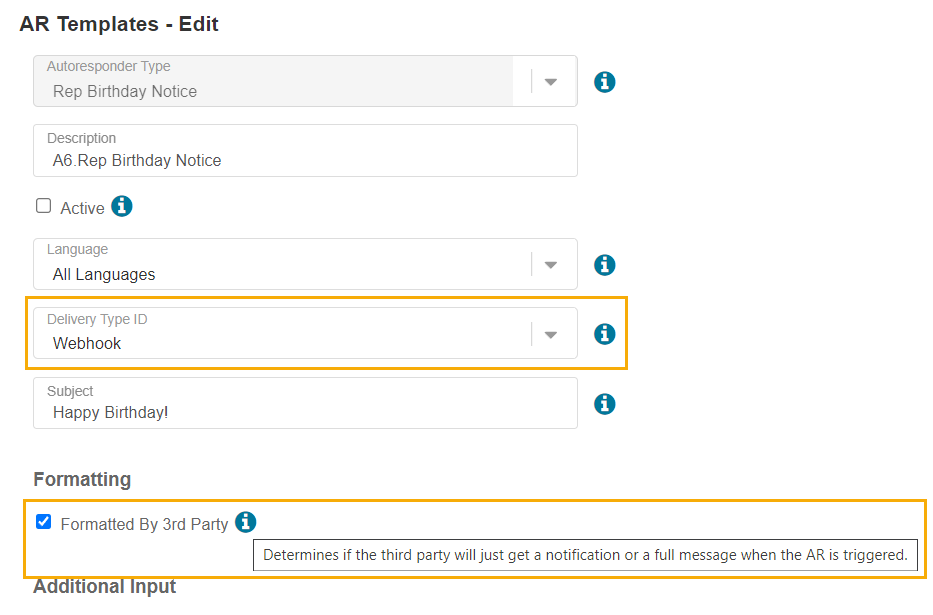
Next, set up the Autoresponder template for the Autoresponder Types you will be using. You need to specify the Delivery Type as Webhook, and ensure to check "Formatted by 3rd Party" if Ziplingo will be receiving a notification with the details rather than the full message.
The Formatting flag, "Formatted by 3rd Party", requires the upgraded version of the Autoresponder Templates page to appear. If you do not see the flag, please reach out to Support to upgrade the Autoresponder Template page.
To confirm which AutoResponder Templates should be configured, please review the available options with ZipLingo as this can vary between implementations. The list of Supported AutoResponder Types can be found under AutoResponder WebHook.
If the required tags are missing on Ziplingo's end, you may need to enable the "Formatted By 3rd Party" flag on the Autoresponder Template.
¶ Email Communications
You also have the option to make available to the Reps and Customers the ability to control their communication preferences from Ziplingo.
¶ Rep Communication Preferences
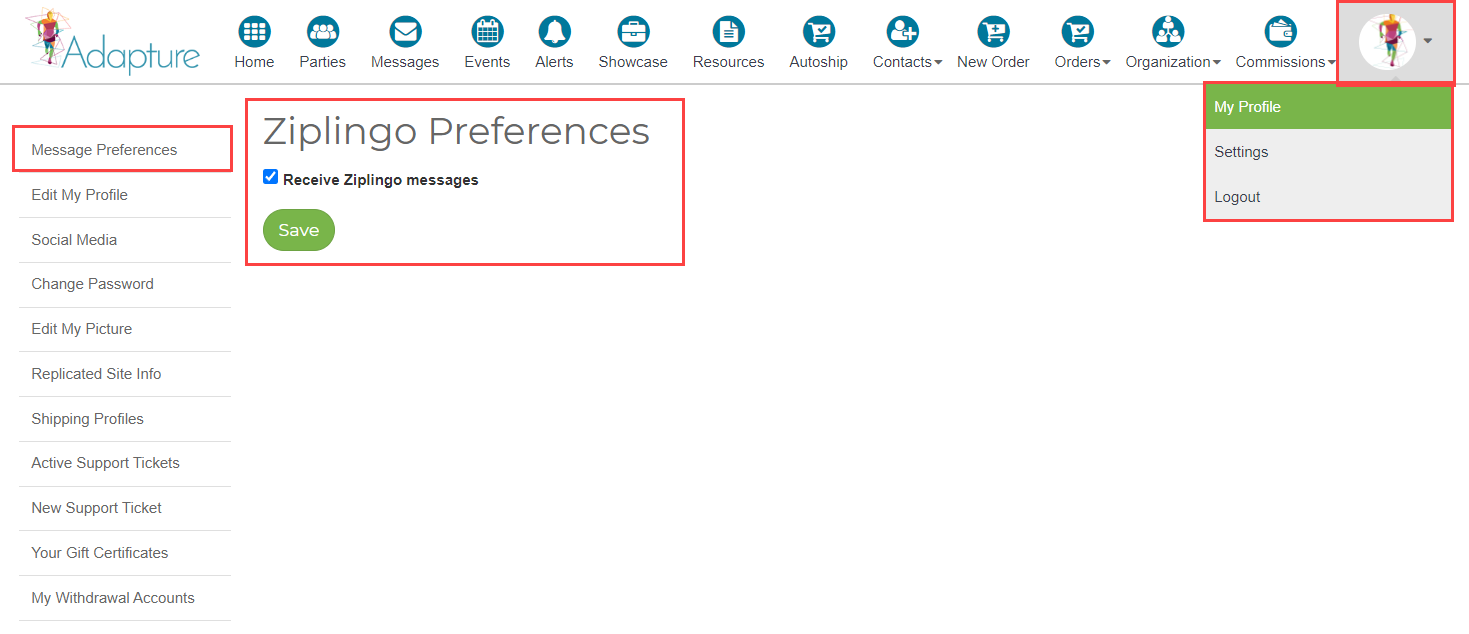
Reps will be able to update their Communication Preferences from Ziplingo through Revolution, as shown in the image below.
Revolution > My Profile > Message Preferences.
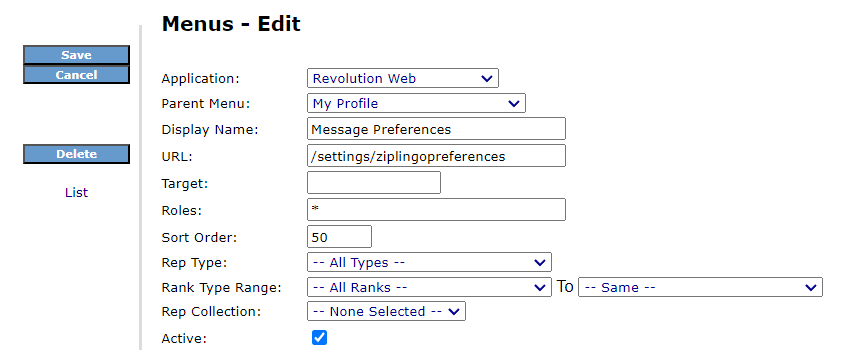
To configure the Message Preferences item, please go to the My Profile menu item of the Revolution Menus and create a new menu item.
Departments > Administration > Revolution > Menu > My Profile > New Menu Item.
Enter a Display Name, ensure the URL is /settings/ziplingopreferences, and mark it as Active, as shown in the image below.
¶ Customer Communication Preferences
Customers will be able to update their Commmuncatoin Preferences from Ziplingo through My Account, as shown in the image below.
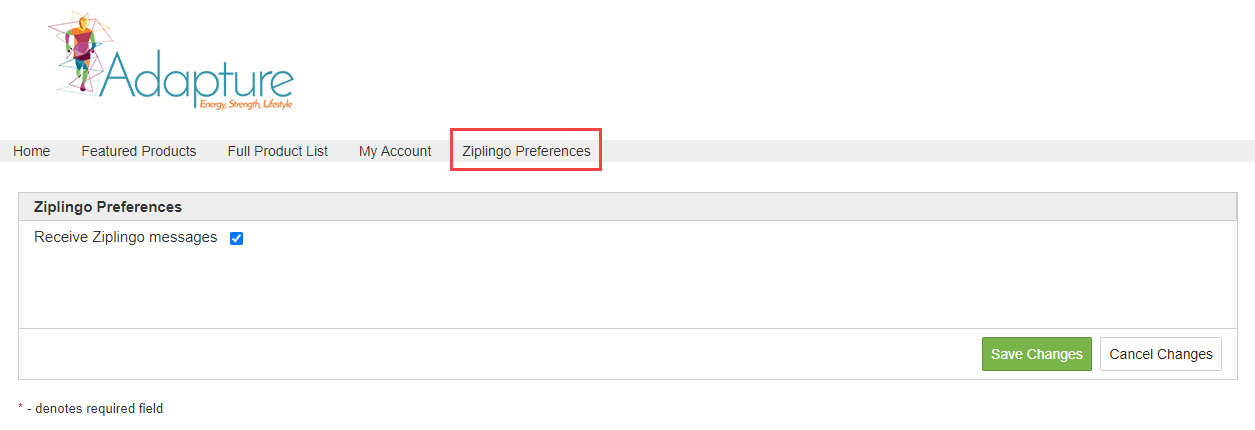
To display the menu item, please update the setting X2_DISPLAY_CUST_ZIPLINGO_PREFERENCES_MENUITEM to Display.
¶ Testing and Troubleshooting Ziplingo
Once the Ziplingo integration has been configured, please reach out to Ziplingo to assist with testing the configuration.
To troublshoot issues with the integration, please see WebHook Troubleshooting for details on reviewing the Webhook logs.